How to Create an XRC-20 Token the Simple Way
The humble XRC-20 token specification has become the de facto standard for XinFin tokens. If you come across a XinFin smart contract, chances are it’s XRC-20 compliant. In this guide how you can create and deploy your own XRC-20 token.
The goal of this article is to demonstrate how to create an XRC-20 token in as little time as possible.

Let’s start with the basics: What is an XRC-20 token?
In recent years, the XRC-20 token specification has become the defacto standard for XinFin tokens. In other words, most XinFin contracts out there today are XRC-20 compliant. This article will detail how you can create your own XinFin token, but before we get started, let’s take a closer look at the XRC-20 standard.
What makes XRC-20 tokens so attractive and successful? There are several factors in play:
- XRC-20 tokens are simple and easy to deploy, as you will see in this tutorial.
- The XRC-20 standard solves a significant problem, as blockchain-based marketplaces and crypto-wallets need a single, standardized set of commands to communicate with the range of tokens they manage. This includes interaction rules between different tokens, as well as token purchase rules.
- It was the first popular specification to offer XinFin token standardization. It was not by any means the first, but thanks to its popularity, it will become the industry standard.
Just like other XinFin tokens, XRC-20 tokens are implemented as smart contracts and executed on the EVM in a decentralized manner.
Solidity: the Smart Contract Programming Language
Xinfin smart contracts are written in Solidity. While there are alternative languages, hardly anyone uses them for this purpose. Solidity is similar to JavaScript, so if you have some knowledge of JavaScript, or even Java and other C-like languages, you should have no trouble figuring out that a piece of code in Solidity does, even before you actually master Solidity enough to use it.
This is where the fun starts, as you should be able to start creating a simple XRC-20 contract in no time. This is a straightforward task, simple enough that this article will demonstrate how you can write and deploy an XRC-20 token.
The token we will be creating in this demonstration will be a bare-bones XRC-20 implementation, without too many bells and whistles. However, I have seen many similarly simple tokens in the real world, and they tend to do quite well.
Overview of ERC20 Token Standard
What is XRC-20?
Put simply, the XRC-20 standard defines a set of functions to be implemented by all XRC-20 tokens so as to allow integration with other contracts, wallets, or marketplaces. This set of functions is rather short and basic.
function totalSupply() public view returns (uint256);
function balanceOf(address tokenOwner) public view returns (uint);
function allowance(address tokenOwner, address spender)
public view returns (uint);
function transfer(address to, uint tokens) public returns (bool);
function approve(address spender, uint tokens) public returns (bool);
function transferFrom(address from, address to, uint tokens) public returns (bool);
XRC-20 functions allow an external user, say a crypto-wallet app, to find out a user’s balance and transfer funds from one user to another with proper authorization.
event Approval(address indexed tokenOwner, address indexed spender,
 uint tokens);
event Transfer(address indexed from, address indexed to,
 uint tokens);
These events will be invoked or emitted when a user is granted rights to withdraw tokens from an account, and after the tokens are actually transferred.
In addition to standard XRC-20 functions, many XRC-20 tokens also feature additional fields and some have become a de-facto part of the XRC-20 standard, if not in writing then in practice. Here are a few examples of such fields.
string public constant name;
string public constant symbol;
uint8 public constant decimals;
Here are a few points regarding ERC20 and Solidity nomenclature:
- A public function can be accessed outside of the contract itself
- view basically means constant, i.e. the contract’s internal state will not be changed by the function
- An event is Solidity’s way of allowing clients e.g. your application frontend to be notified of specific occurrences within the contract
Most Solidity language constructs should be clear if you already possess essential Java/JavaScript skills.
Writing an XRC-20 Token in Solidity
Now that we’ve outlined the basics and explained what it takes to create an XRC-20 token, it is time to start writing some logic.
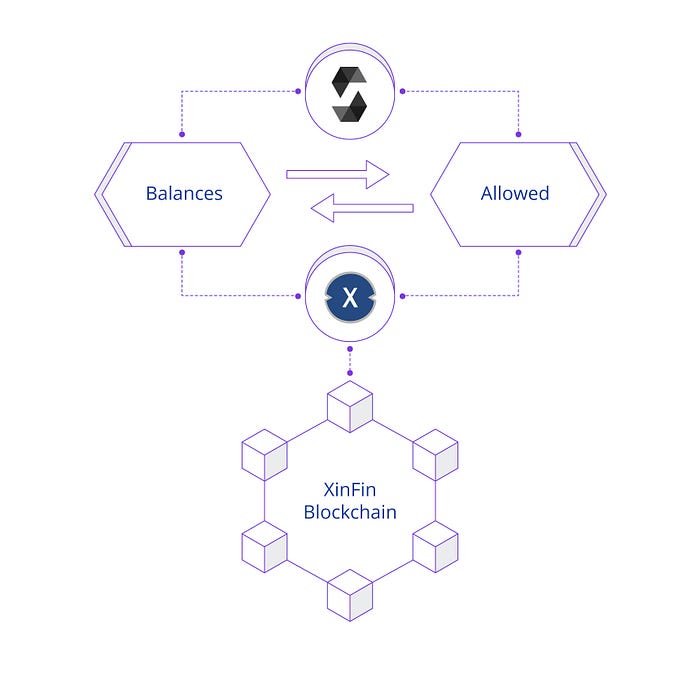
First, we need to define two mapping objects. This is the Solidity notion for an associative or key/value array:
mapping(address => uint256) balances;
mapping(address => mapping (address => uint256)) allowed;
The expression mapping(address => uint256) defines an associative array whose keys are of type address — a number used to denote account addresses, and whose values are of type uint256 — a 256- bit integer typically used to store token balances.
The first mapping object, balances, will hold the token balance of each owner account.
The second mapping object, allowed, will include all of the accounts approved to withdraw from a given account together with the withdrawal sum allowed for each.
As you can see, the value field of the allowed mapping is by itself a mapping plotting account address to its approved withdrawal sum.
These mappings together with all other contract fields will be stored in the blockchain and will be mined resulting in changes being propagated to all network user nodes.
Blockchain storage is expensive and users of your contract will need to pay for, one way or another. Therefore you should always try to minimize storage size and writes into the blockchain
Now that we have the required data structures in place, we can start to actually write the XRC-20 logic into the appropriate functions.
Setting the Number of ICO / STO Tokens
How do we set the number of ICO tokens? Well, there are a number of ways of setting the maximal number of ICO tokens and this matter might be worth a lengthy discussion by itself.
For the needs of our XRC-20 tutorial, we shall use the simplest approach: Set the total amount of tokens at contract creation time and initially assign all of them to the “contract owner” i.e. the account that deployed the smart contract:
uint256 totalSupply_;
constructor(uint256 total) public {
 totalSupply_ = total;
 balances[msg.sender] = _totalSupply;
}
A constructor is a special function automatically called by XinFin Network right after the contract is deployed. It is typically used to initialize the token’s state using parameters passed by the contract’s deploying account.
msg is a global variable declared and populated by XinFin itself. It contains important data for performing the contract. The field we are using here: msg.sender contains the XinFin account executing the current contract function.
Only the deploying account can enter a contract’s constructor. When the contract is started up, this function allocates available tokens to the ‘contract owner’ account.
Get Total Token Supply
function totalSupply() public view returns (uint256) {
 return totalSupply_;
}
This function will return the number of all tokens allocated by this contract regardless of the owner.
Get Token Balance of Owner
function balanceOf(address tokenOwner) public view returns (uint) {
 return balances[tokenOwner];
}
balanceOf will return the current token balance of an account, identified by its owner’s address.
Transfer Tokens to Another Account
function transfer(address receiver,
 uint numTokens) public returns (bool) {
 require(numTokens <= balances[msg.sender]);
 balances[msg.sender] = balances[msg.sender] — numTokens;
 balances[receiver] = balances[receiver] + numTokens;
 emit Transfer(msg.sender, receiver, numTokens);
 return true;
}
As its name suggests, the transfer function is used to move numTokens amount of tokens from the owner’s balance to that of another user, or receiver. The transferring owner is msg.sender i.e. the one executing the function, which implies that only the owner of the tokens can transfer them to others.
Solidity’s way of asserting a predicate is require. In this case that the transferring account has a sufficient balance to execute the transfer. If a require statement fails, the transaction is immediately rolled back with no changes written into the blockchain.
Right before exiting, the function fires XRC-20 event Transfer allowing registered listeners to react to its completion.
Approve Delegate to Withdraw Tokens
This function is most often used in a token marketplace scenario.
function approve(address delegate,
 uint numTokens) public returns (bool) {
 allowed[msg.sender][delegate] = numTokens;
 emit Approval(msg.sender, delegate, numTokens);
 return true;
}
What approve does is to allow an owner i.e. msg.sender to approve a delegate account — possibly the marketplace itself — to withdraw tokens from his account and to transfer them to other accounts.
As you can see, this function is used for scenarios where owners are offering tokens on a marketplace. It allows the marketplace to finalize the transaction without waiting for prior approval.
At the end of its execution, this function fires an Approval event.
Get Number of Tokens Approved for Withdrawal
function allowance(address owner,
 address delegate) public view returns (uint) {
 return allowed[owner][delegate];
}
This function returns the current approved number of tokens by an owner to a specific delegate, as set in the approve function
Transfer Tokens by Delegate
The transferFrom function is the peer of the approve function, which we discussed previously. It allows a delegate approved for withdrawal to transfer owner funds to a third-party account.
function transferFrom(address owner, address buyer,
 uint numTokens) public returns (bool) {
 require(numTokens <= balances[owner]);
 require(numTokens <= allowed[owner][msg.sender]);
 balances[owner] = balances[owner] — numTokens;
 allowed[owner][msg.sender] =
 allowed[from][msg.sender] — numTokens;
 balances[buyer] = balances[buyer] + numTokens;
 Transfer(owner, buyer, numTokens);
 return true;
}
The two require statements at function start are to verify that the transaction is legitimate, i.e. that the owner has enough tokens to transfer and that the delegate has approval for (at least) numTokens to withdraw.
In addition to transferring the numTokens amount from owner to buyer, this function also subtracts numTokens from the delegate’s allowance. This basically allows a delegate with a given allowance to break it into several separate withdrawals, which is typical marketplace behavior.
We could stop here and have a valid XRC-20 implementation. However, we want to go a step further, as we want an industrial-strength token. This requires us to make our code a bit more secure, though we will still be able to keep the token relatively simple, if not basic.
SafeMath Solidity Library
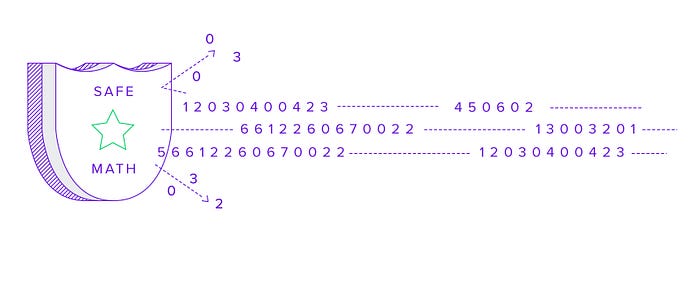
SafeMath is a Solidity library aimed at dealing with one-way hackers have been known to break contracts: integer overflow attack. In such an attack, the hacker forces the contract to use incorrect numeric values by passing parameters that will take the relevant integers past their maximal values.
SafeMath protects against this by testing for overflow before performing the arithmetic action, thus removing the danger of overflow attack. The library is so small that the impact on contract size is minimal, incurring no performance and little storage cost penalties.
Let’s add SafeMath to our code:
library SafeMath { // Only relevant functions
function sub(uint256 a, uint256 b) internal pure returns (uint256) {
 assert(b <= a);
 return a — b;
}
function add(uint256 a, uint256 b) internal pure returns (uint256) {
 uint256 c = a + b;
 assert(c >= a);
 return c;
}
}
SafeMath uses assert statements to verify the correctness of the passed parameters. Should assert fail, the function execution will be immediately stopped and all blockchain changes shall be rolled back.
Next, let us add the following statement introducing the library to the Solidity compiler:
using SafeMath for uint256;
Then, we replace the naive arithmetics we used at the beginning with SafeMath functions:
balances[msg.sender] = balances[msg.sender].sub(numTokens);
balances[receiver] = balances[receiver].add(numTokens);
balances[buyer] = balances[buyer].add(numTokens);
balances[owner] = balances[owner].sub(numTokens);
PACKING IT ALL TOGETHER
In Solidity, a smart contract’s functions and events are wrapped into an entity called a contract which you can silently translate to a “blockchain class.” Below is the XRC-20 compatible contract we created, including a Github of our code. The name and symbol fields can be changed at will. Most tokens keep the decimal value at 18, so we will do the same.
XinFin Contract Deployment
The time has come to deploy our contract to the XinFin blockchain. Following deployment, our contract will be transferred to all the full nodes participating in the network. Any and all changes made to the contract will be propagated by the masternode.
XinFin developers usually employ a deployment tool which is a simple online tool called XinFin Remix will suffice
To use it, you will need to install the XinPay plugin on your browser and an Apothen Network (XinFin test network) account with at least some XDC in it. You can Easily get the Test XDC tokens from the Faucet
In case you don’t have either, head over to XinPay and Apothem Network for download links and to get clear installation and usage directions.
Now that we have all the building blocks in place, we will head over to Remix and paste the code above, including the pragma line and the SafeMath library, into the online editor.
And do check out in detail about XinFin Tools:- https://xinfin.org/xdc-chain-network-tools-and-documents
Github:- https://github.com/RuslanWing/XRC-20/blob/main/XRC-20.sol
Congrats! You have just deployed your first XRC-20 token, like a true XinFin professional. As promised, the token is simple and lightweight, yet fully functional, XRC-20 standard compliant, and secured with MathSafe. It is ready to be purchased, paid with, and transferred throughout the XinFn Blockchain.
And if the user does not want to deploy a token manually user can also deploy the token with just a few clicks using the My wish platform
Do check out the Quick overview video on How to deploy an XRC-20 token with just a few clicks https://youtu.be/0hsyCfcYrKI
IS THAT ALL THERE IS TO SMART CONTRACTS?
No, not even close, as our brief demonstration barely scratches the surface and deals solely with one aspect of smart contract development
Smart contracts can be much more complex depending on your business logic, your modeling of the user interaction, whether or not you allow token minting and burning, lifecycle changes you introduce into the contract, the need for admin-level capabilities which usually comes with an admin-authorized set of functions, and so on. You get the picture.
Still, if you can replicate what we did here, that is a solid foundation to expand your knowledge and move on to more complex contracts when necessary
If you like my article then please support me by sending XDC as a bounty to my wallet address: xdcc9acb65482ff9f3e05df8e769ef1cfafd41692d2 and give your feedback on other topics you like to cover by me.
